Import Properties
Panoptic is designed for working with multi-semiotic data, making it possible to import PROPERTIES ASSOCIATED WITH IMAGES into the software interface. Properties imported into Panoptic are automatically structured like properties that can be created manually. They can therefore be modified as you wish.
Panoptic allows the exploration of multi-semiotic corpora. To meet this methodological need, Panoptic offers a series of functionalities for manipulating images AND associated textual data. It is therefore possible to associate a properties file, in .csv format, with imported images.
What is a .csv file?
A file with the .csv extension (for "Comma-Separated Values") is a text file format used to store tabular data, such as that found in a spreadsheet (Excel for example). In a .csv file, each row represents a line of data, and the values in each column are separated by a semicolon. This type of file is generally managed in a plain text editing application (notepad, textedit).
What types of data can be imported?
| Name | Explanation |
|---|---|
| text | Textual data: lorem ipsum... |
| number | Numerical data: 0123456789 |
| tag | text, which will be presented as tags in the Panoptic interface |
| multi_tags | several blocks of text, separated by commas (,), which will be presented as tags in the Panoptic interface |
| checkbox | a true (checked box) or false (unchecked box) value |
| url | a link to a website |
| date | a date |
| color | Colors, from the following list: red, pink, grape, violet, indigo, blue, cyan, teal, green, lime, yellow, orange |
How to correctly format this data?
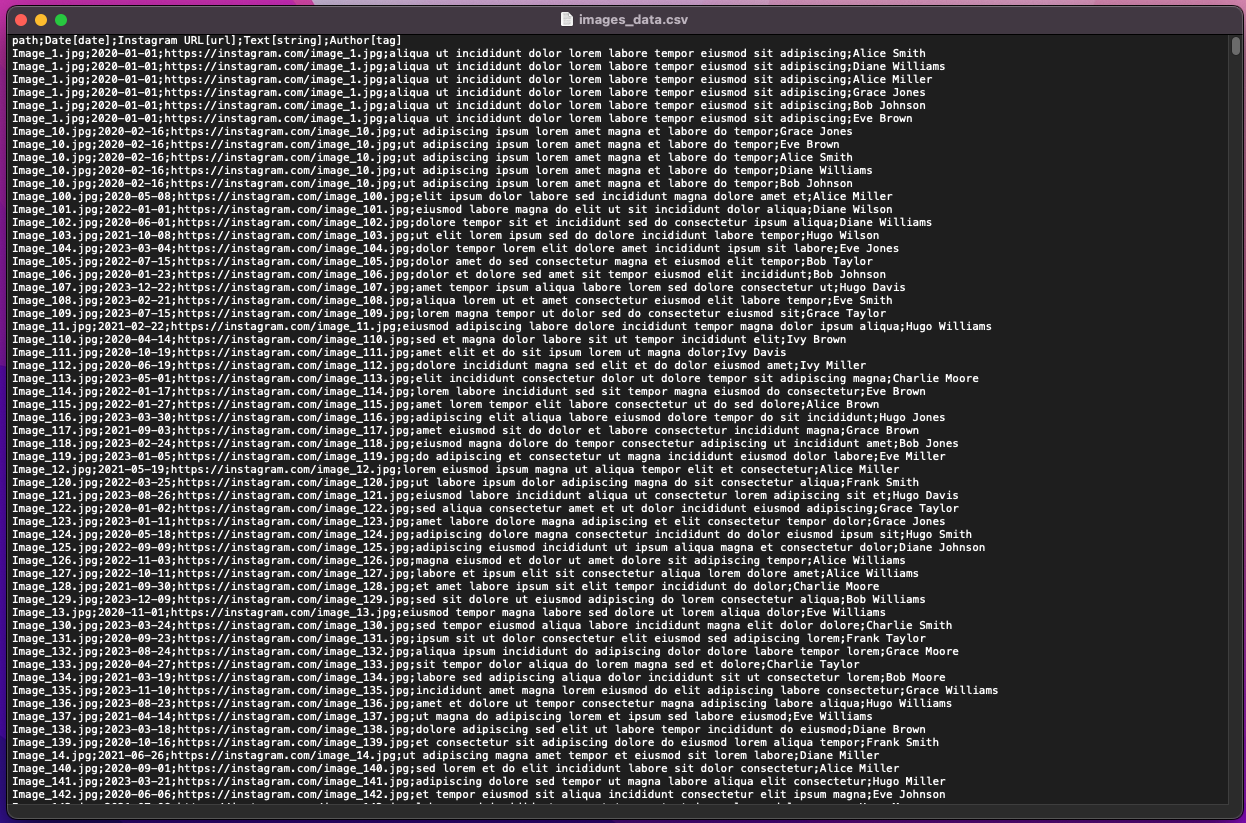
The .csv file containing the data associated with the images must be structured as follows: - All data must be separated by semicolons (;). - The first line of the .csv must contain the headers. The part in square brackets corresponds to the property type (see previous page). The part outside the square brackets corresponds to the name you wish to give to the property. - This first line must be written as follows: path;creation date[date];link to image[url];color code 1[color];color code 2[color]; - Important: the very first data has a different format ("path"): it is the path (relative or complete) to where the image is located on your computer: C:/my/personal/folder/image1.jpg. For the rest, you can order the metadata as you wish. - The following lines contain the metadata for each image, filled according to the type of properties: C:/my/personal/folder/image1.jpg;24/10/2024;https://instagram.com/image.png;blue;red
Formatting specifics:
- Several possibilities for timestamping: 2024; 02/2024; 19/02/2024; 19/02/2024 12:45; 19/02/2024 12:45:55; 19-02-2024T12:45:55.000Z; 2024/02/19 12:45:55.
- For importing multi_tags, the different tags entered must be separated by a comma (,).
Example of a well-formatted .csv file for Panoptic
How to import well-formatted data into Panoptic?
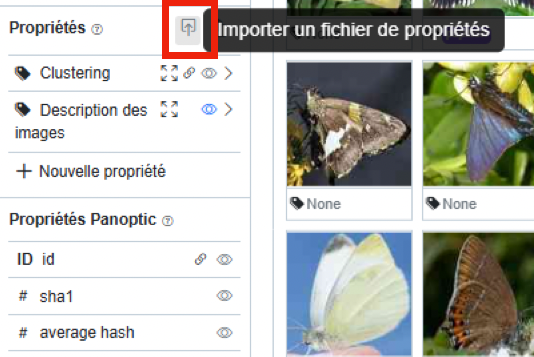
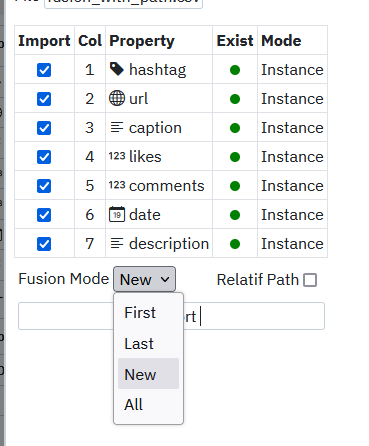
When your file to import is well structured, go to your Panoptic project and, to the right of the "Properties" section, click on the property import icon. In the window that opens, choose the .csv file to import. Panoptic then opens the file and indicates a summary in a five-column table. You can act on the first and last: - Check or uncheck the properties to import (by default all properties from the .csv table will be imported). - Indicates the column number in the original .csv. - Indicates the name of the properties and their type as a logo. - Indicates whether the property already exists in Panoptic or not. - Change the property mode in Panoptic: "instance" or "image".
Specify by checking or unchecking the "Relative Path" box whether the image path indicated in the .csv file is relative or absolute.
You can then validate the import by clicking on "Import". The data is imported into the "properties" section of Panoptic and is therefore now manipulable.
Precision on the data merge mode
If one wishes to import already existing properties (typically, if two people each work on the same image corpus and annotate it before sharing their annotations to update their respective progress), there is the possibility of choosing the data merge mode. Four possibilities are offered:
- New: this mode creates a new instance of the image specified in the path column (thus does not overwrite existing data)
- First: this mode overwrites the properties of the oldest instance of an image recorded in Panoptic, and replaces them with those specified in the .csv file being imported.
- Last: this mode overwrites the properties of the most recent instance of an image recorded in Panoptic, and replaces them with those specified in the .csv file being imported.
- All: this mode overwrites all properties corresponding to the different instances of an image to replace them with the properties specified in the imported .csv file.