Annotating Properties
Once a property is created and displayed, it is possible to annotate the imported images.
When a property is displayed, an empty line is shown below each image. If two properties are displayed, two lines will be shown below each image, and so on.
Annotating an Image
To annotate a single image, simply click on the empty space associated with the correct property below the image, and fill in the desired annotation.
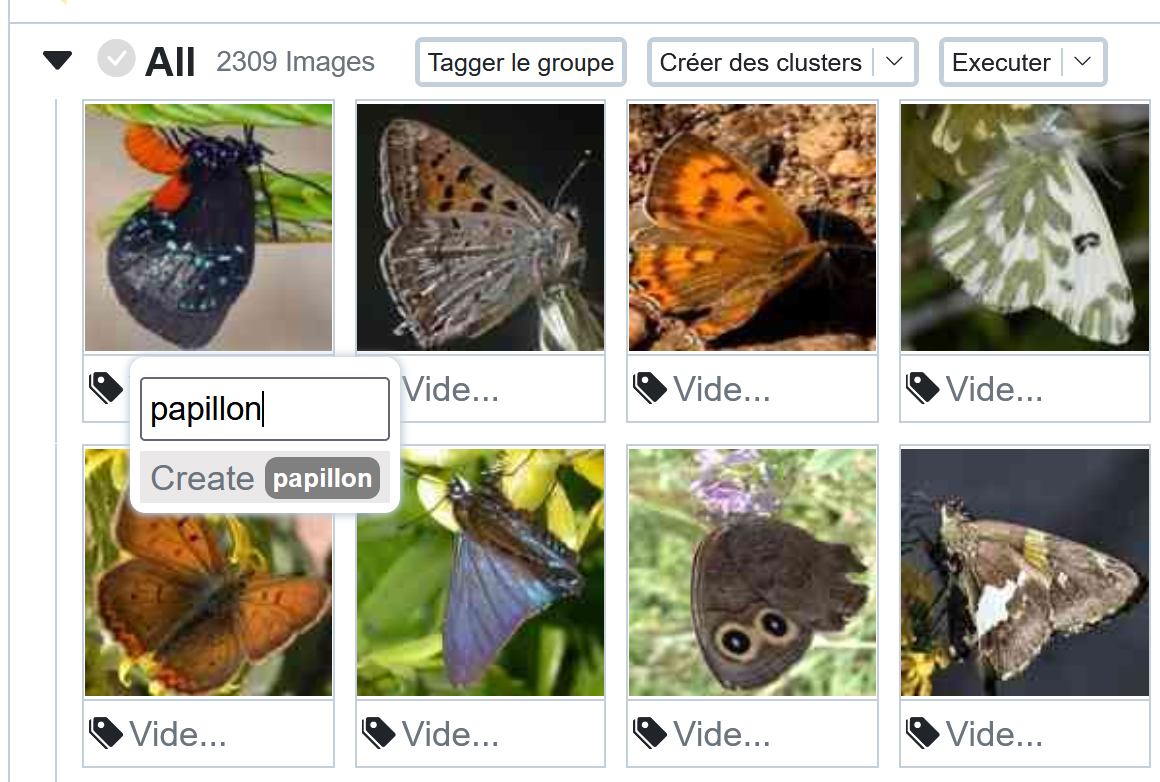
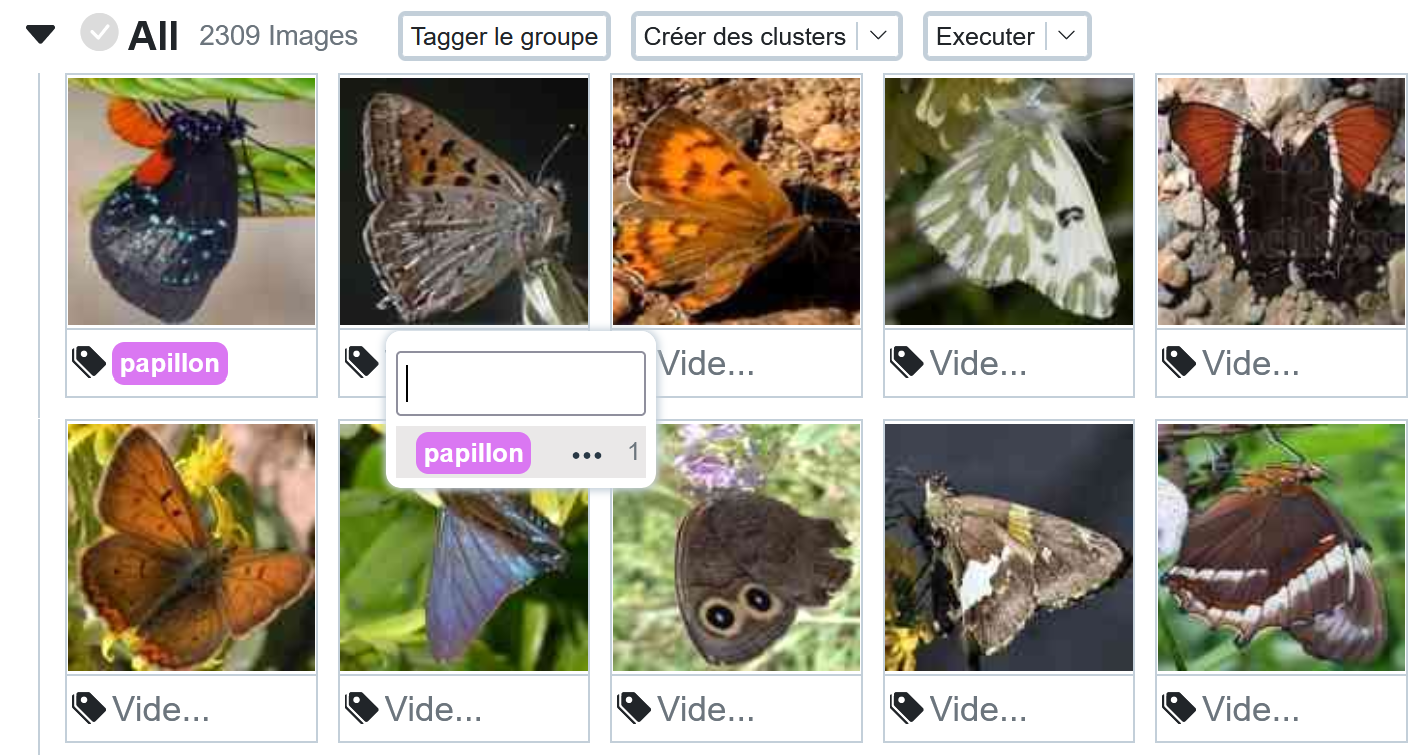
Once an annotation is created, it is automatically suggested for subsequent annotations.
Batch Annotating
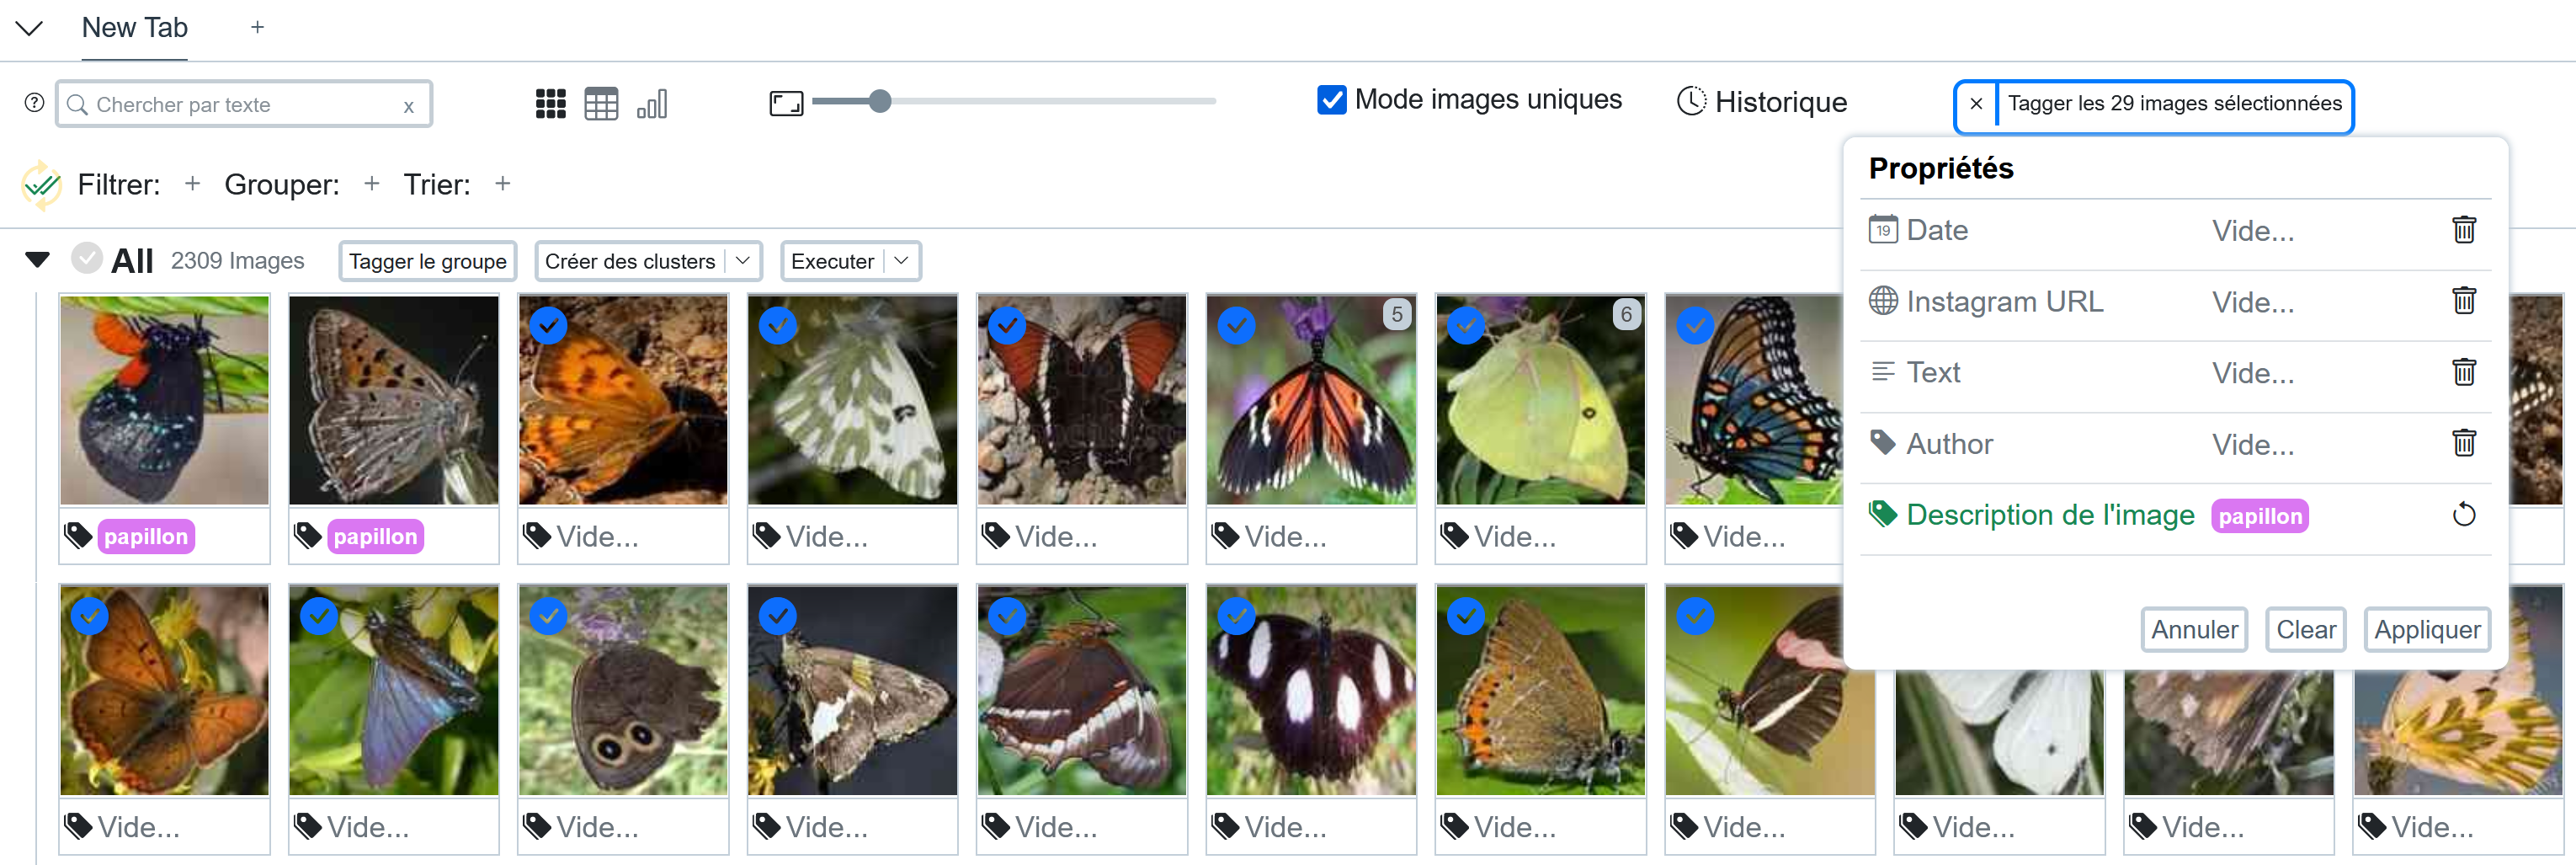
It is possible to annotate images in batches. When you hover over an image, a clickable checkbox appears in the upper right corner of the image. By clicking, the checkbox turns blue: the image is selected. You can select several images this way. It is possible to select all images located between two images by selecting these two images while holding down the shift key.
When several images are thus selected, a "Tag X selected images" option appears in the upper right corner of Panoptic. By clicking on it, you can select as many annotations as you wish for all selected images. Finally, click "Apply" and the images will be annotated.
Attention
Once images are annotated in this way, remember to deselect the selected images so as not to re-annotate them later. To deselect them, click on the cross (x) to the left of "Tag X selected images".
Annotating a Cluster of Similar Images
Annotating an Entire Cluster
To create clusters of similar images, see the documentation on clusters.
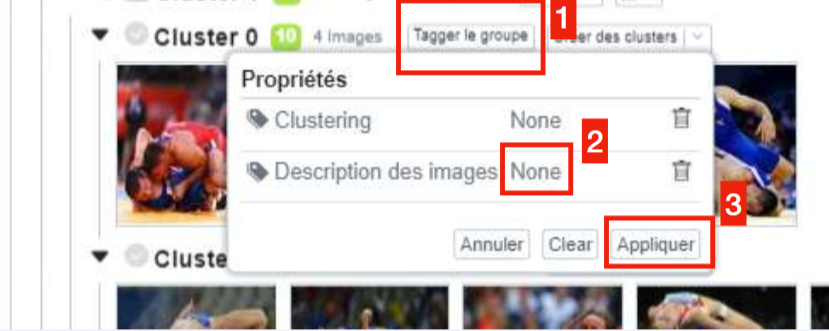
It is possible to annotate an entire cluster by clicking on the "Tag group" option above a cluster.
In the window that opens, click next to the created property (on "None"), and choose an existing tag or create a new one. Finally, click "Apply."
Annotating Part of a Cluster, or Several Parts of Several Clusters
If the proposed clusters are not suitable enough for annotation, it is possible to select only a part of the images displayed to annotate them. Here, simply reproduce the batch annotation described earlier, but within a cluster.

Important
It is possible to create sub-clusters (see the documentation on clusters). They function like clusters and are therefore annotatable in the same way.
Saving Clusters.
By default, clusters are not saved, as they are computer-generated proposals for image associations that a human must validate.
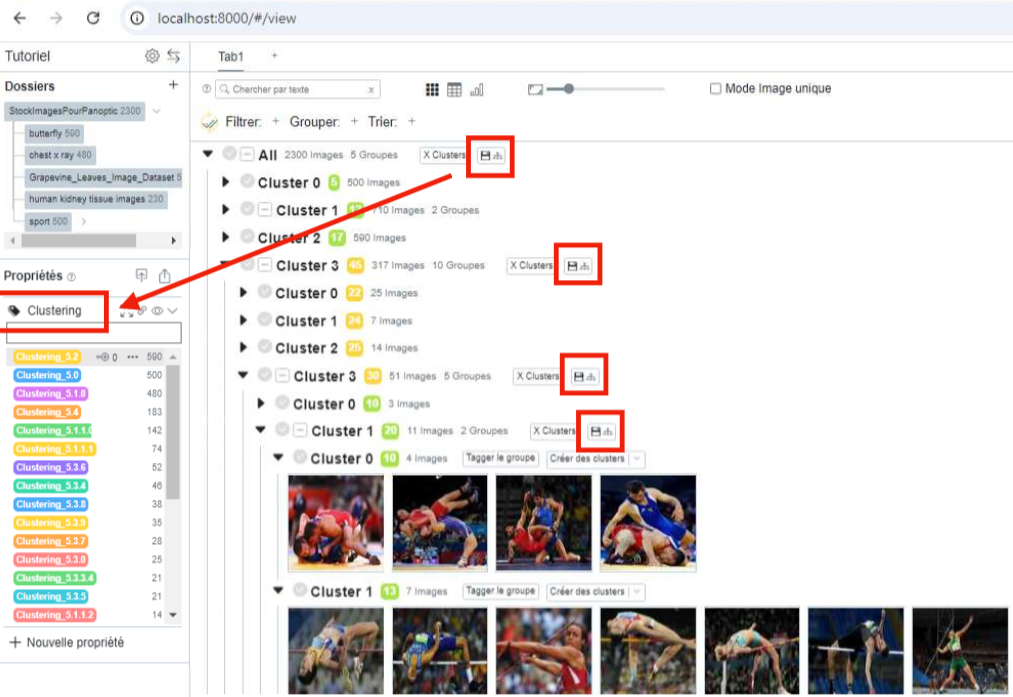
If you wish to save a cluster, you must specify it by clicking on the floppy disk icon next to the open clusters. You can save each cluster or sub-cluster independently, or all clusters directly, by clicking on the floppy disk located at the root (at the very top, above the first images).
When clusters are saved, they are recorded in a dedicated property, named "clustering," which you can find on the left side of the screen, under the property section.
You can then rename each element of this property to give meaning to the clustering performed, by going to the tag management window (see the documentation on managing Tag and Multi-tag properties).
Annotating Images Similar to an Image
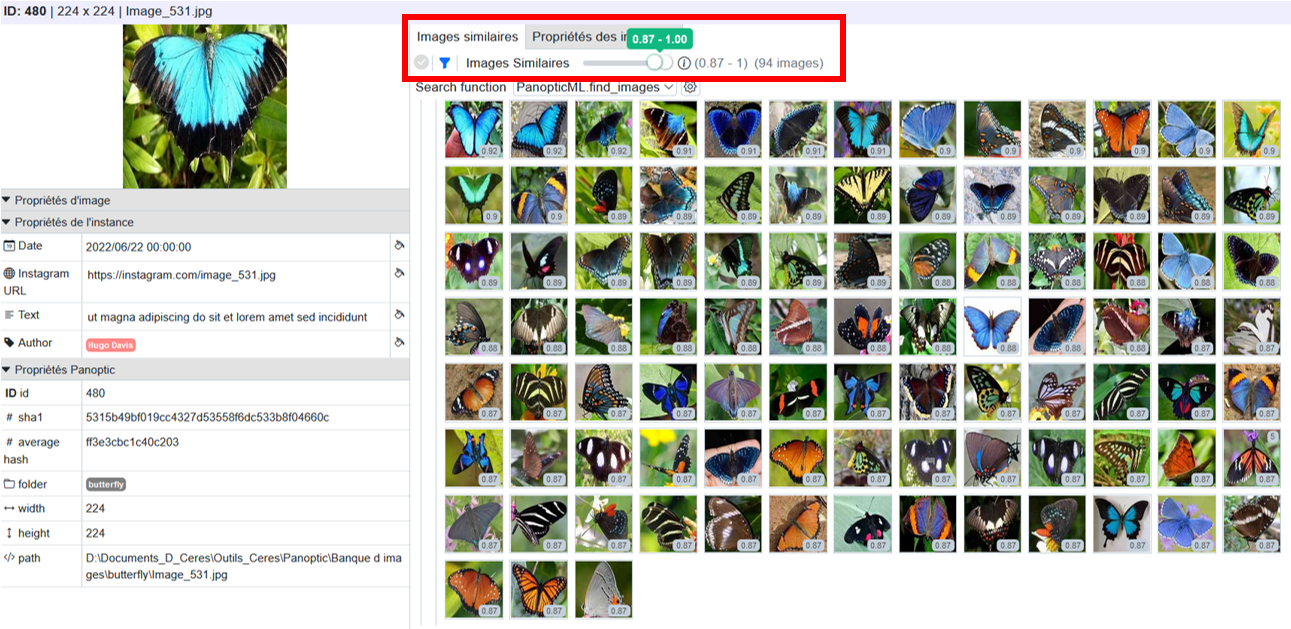
When you click on an image, a contextual window opens, showing on the left the image's properties, and on the right, images similar to this selected image.
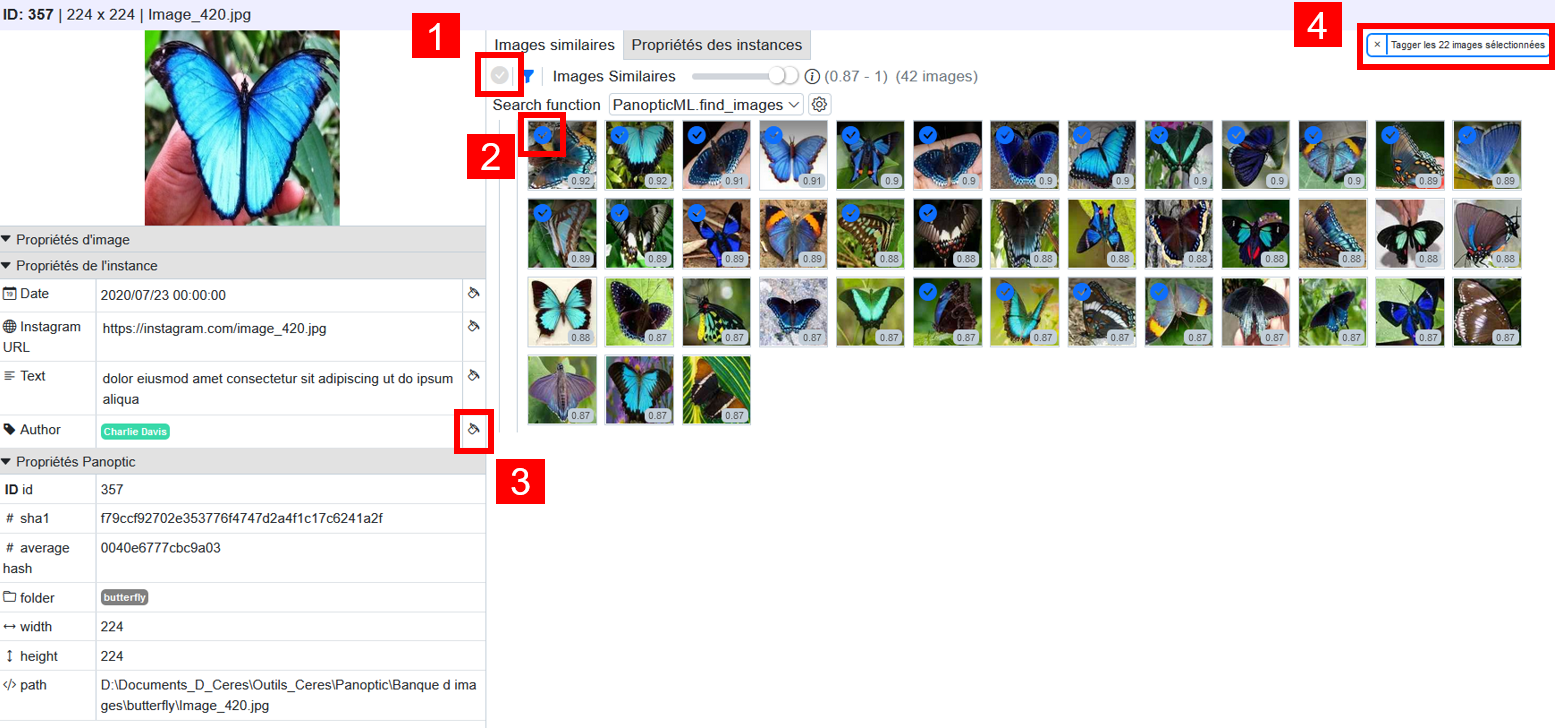
You can annotate these different images directly, in batches. Several options here:
You can choose to: select all displayed images (1), or select (or deselect) certain images (2) to refine.
You can then click on the "paint bucket" icon (3) to annotate all selected images according to the chosen property. You can also click on "Tag X selected images" in the upper right to open a menu displaying all available properties, and tag the selected images as you wish (identically to the original image, or differently).
Annotating Images Similar to a Group of Images
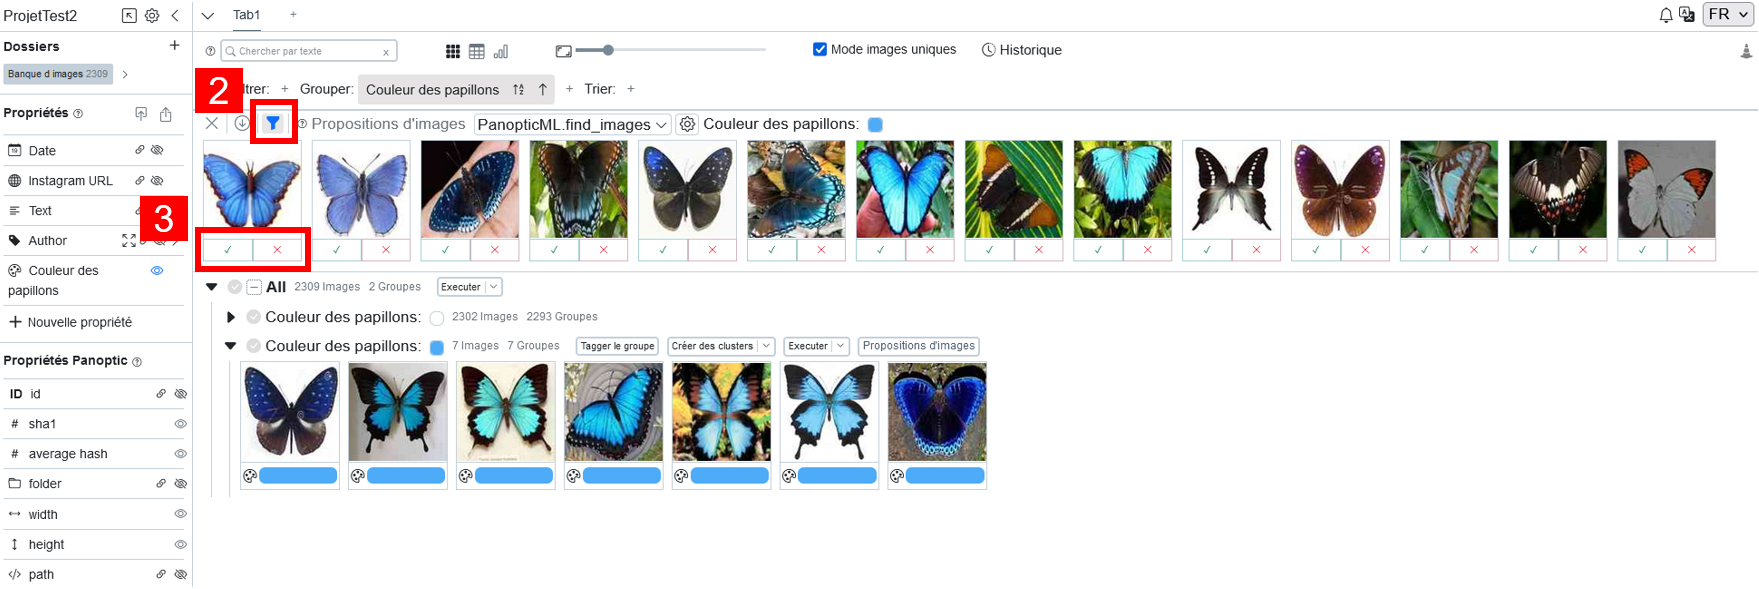
If you have already started annotating your image corpus, you can continue annotating by searching for images similar to an already annotated group of images. To do this, you must first group the images according to a property (see the documentation on image grouping). For each group, there is then an "Image Proposals" button that you can click (1).
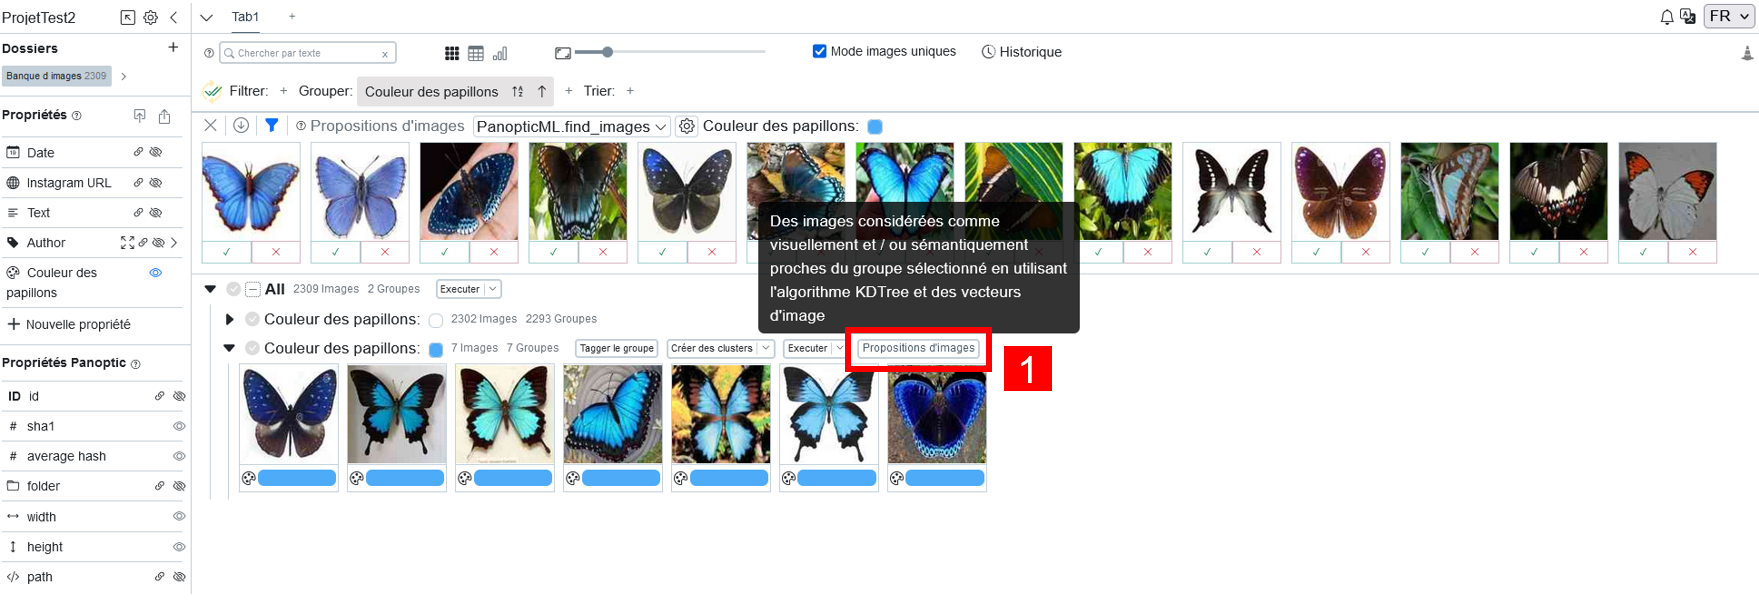
If filters are active in the view you are working in, it is possible to choose whether to display similar images only present in that view, or not, by activating or deactivating the filter (2).
Add images to the group:
Once the image proposal window has appeared, you just need to click on the green checkmark or the red cross (3) to accept that the proposed image joins the associated group, or not (i.e., to validate or not that the image is tagged with the corresponding annotation).